The carb vent filter was designed to keep dust and dirt from wearing out your motorcycle top end. Regular air filter maintenance and oil changes are not enough...
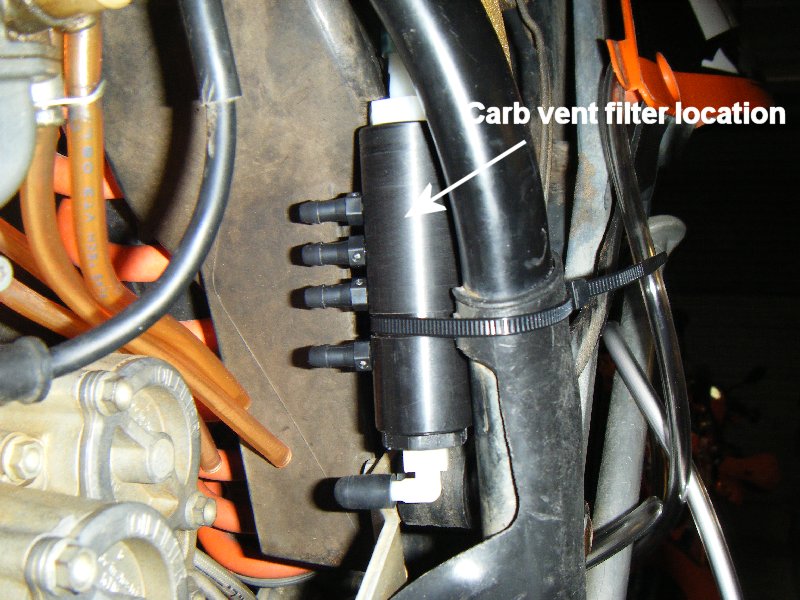
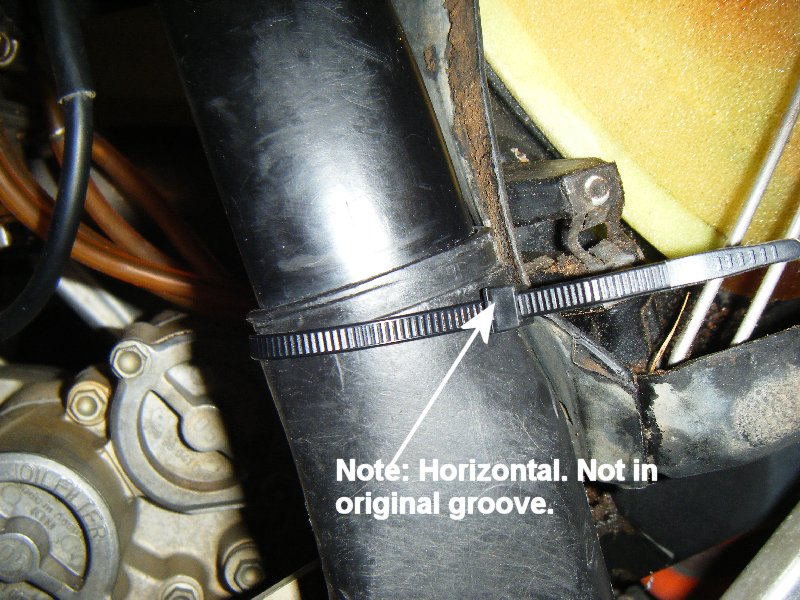
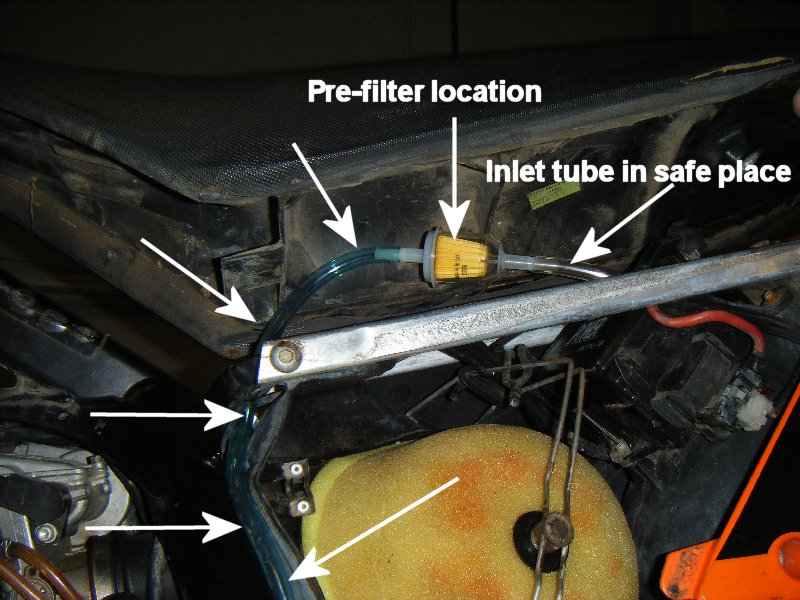
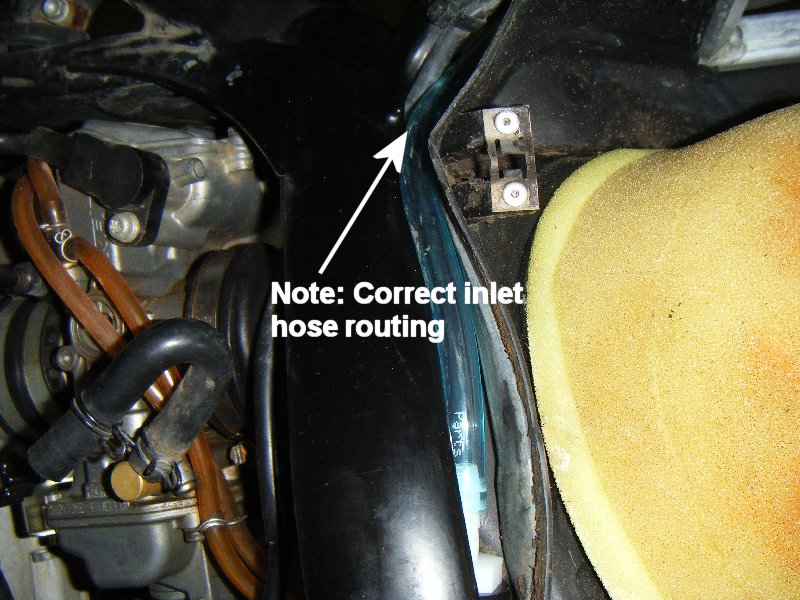
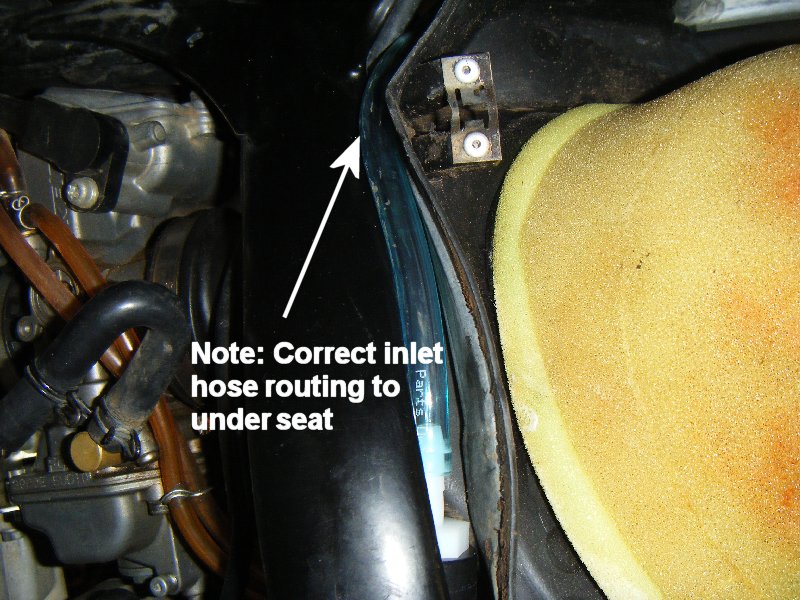
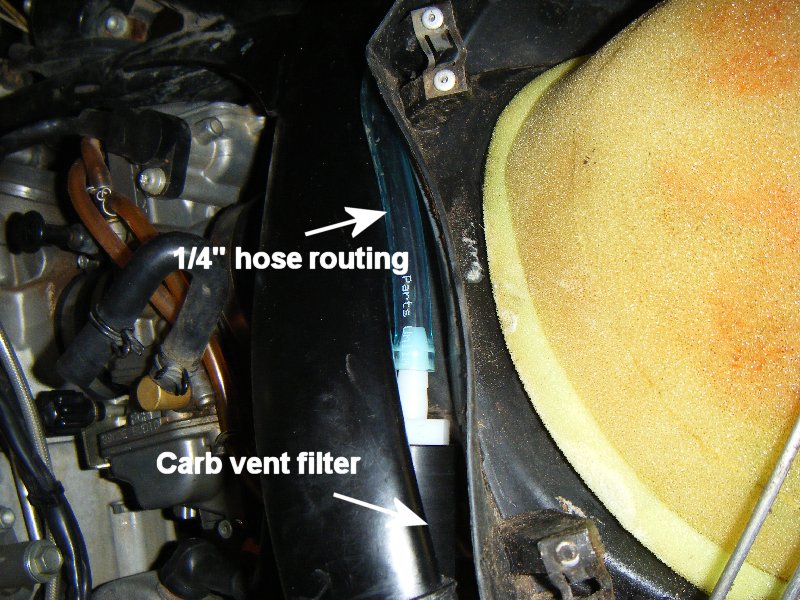
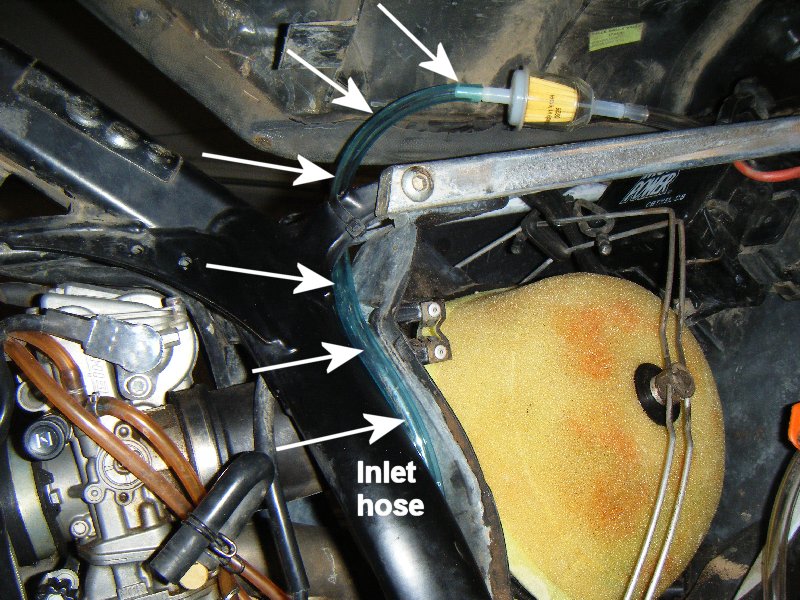
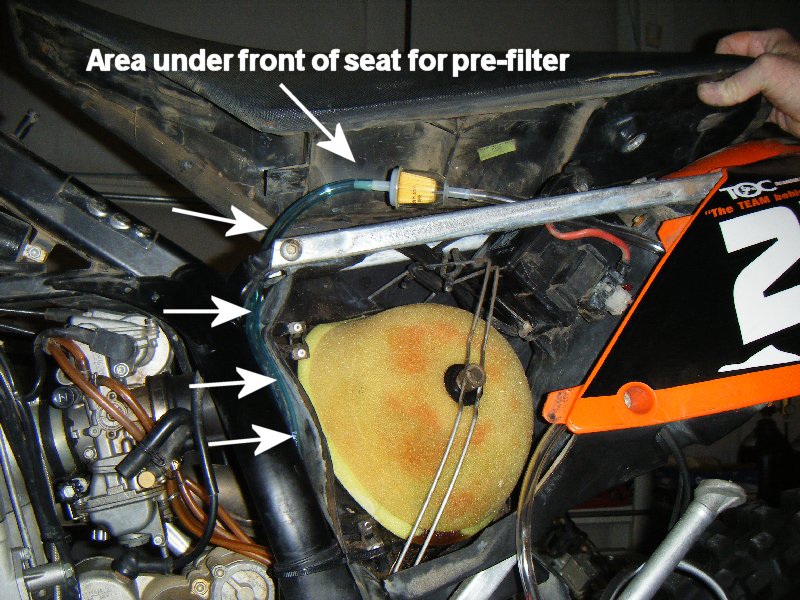
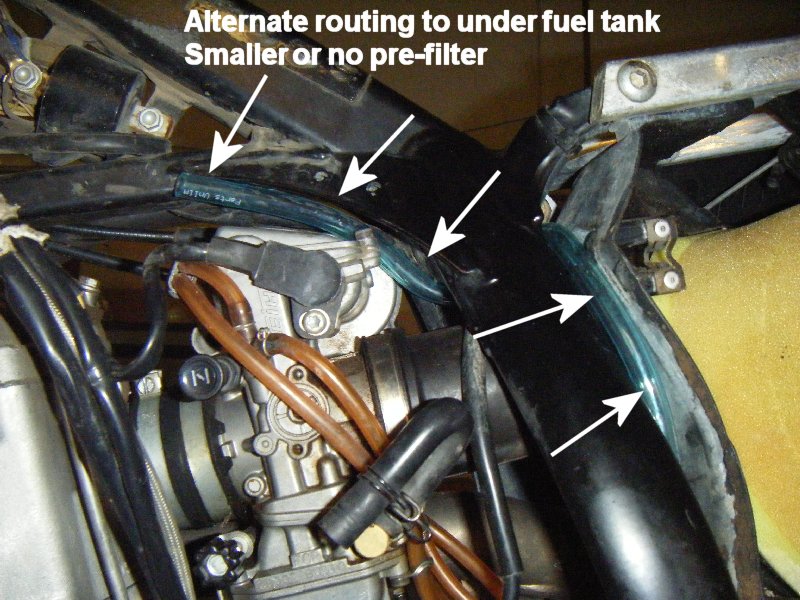
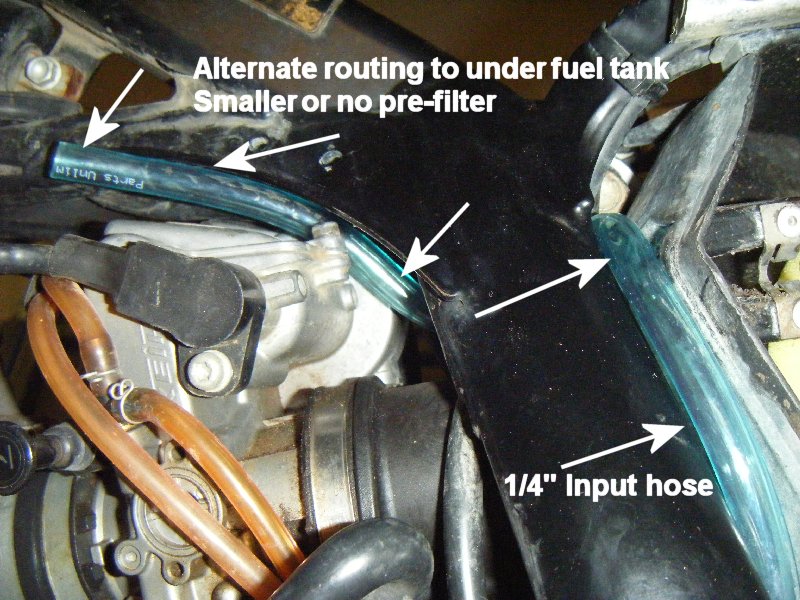
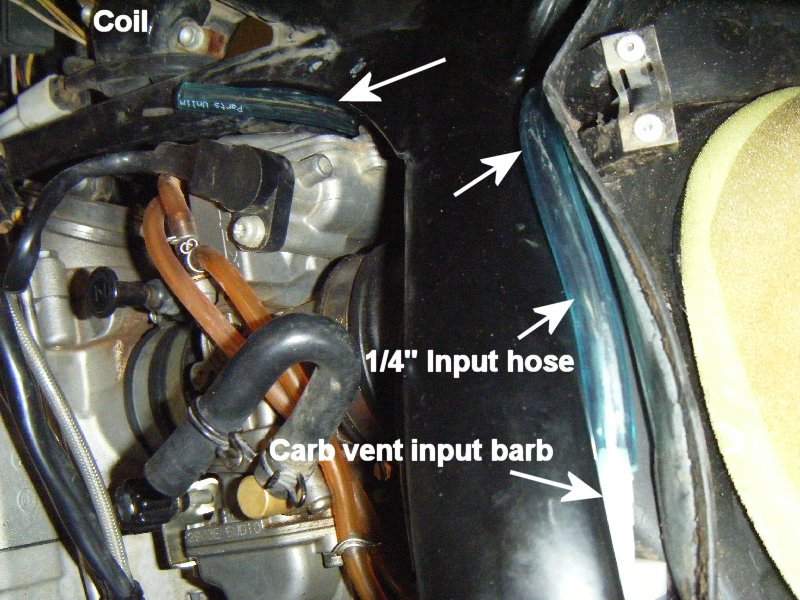
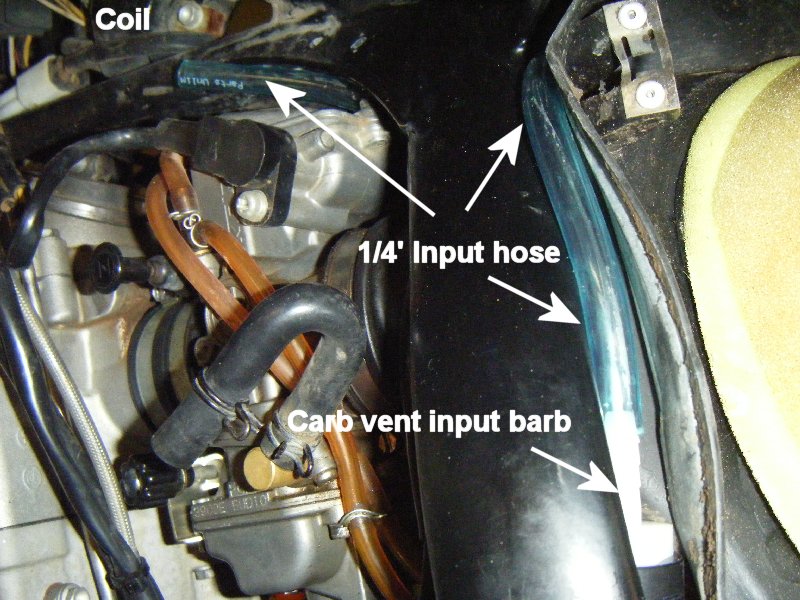
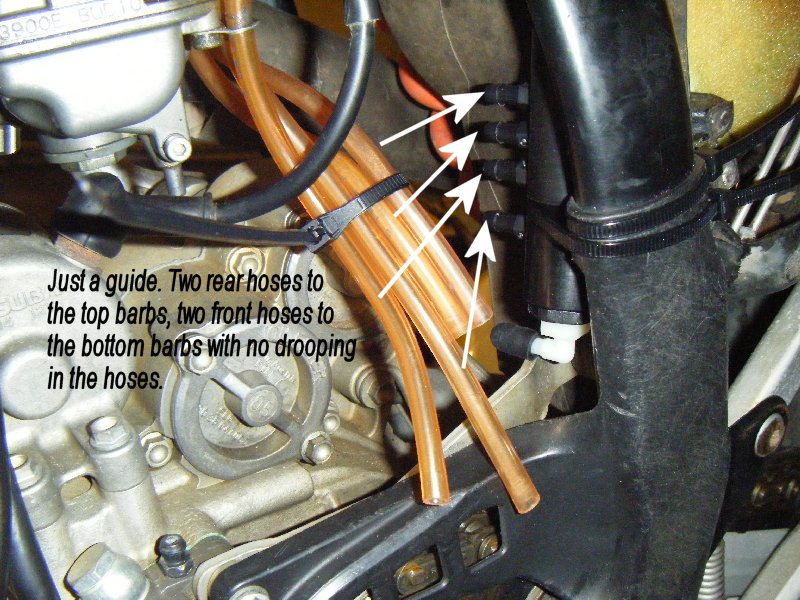
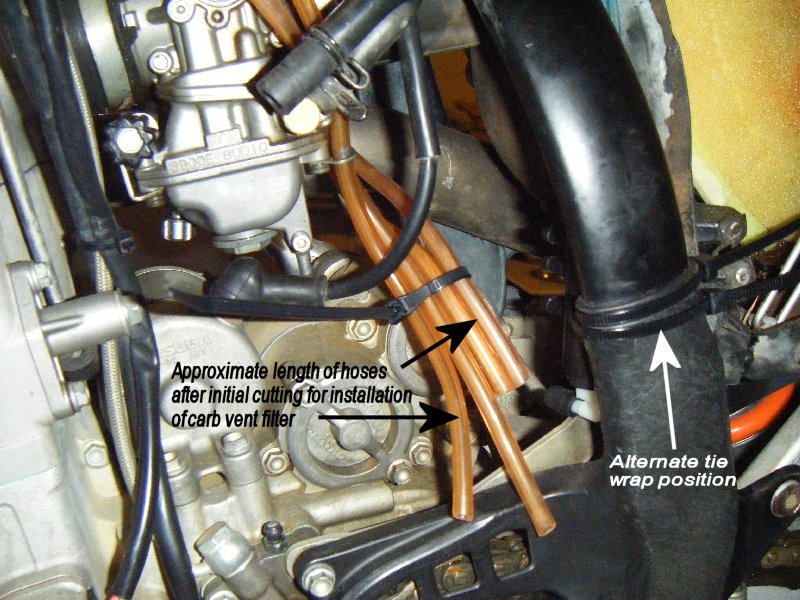
The carb vent filter was designed to keep dust and dirt from wearing out your motorcycle top end. Regular air filter maintenance and oil changes are not enough... The carb vent filter was designed to keep dust and dirt from wearing out your motorcycle top end. Regular air filter maintenance and oil changes are not enough...Carb Vent Filter Instructions for KTM RFS (and other bikes)This carb vent filter is designed to filter the air entering the carburetor through the carb vent hoses/tubing. This filter will help keep dust and dirt from entering the carb and engine by connecting to the vent tubes that allow the carburetor to properly breathe. The carb vent filter uses a small serviceable foam filter that can be removed for cleaning/oiling to aid in trapping the dust and dirt much like the air filter does. Adding a inexpensive automotive fuel filter to the inlet side of the vent filter can help minimize the service intervals by acting as a pre-filter. This pre-filter can be placed under the seat by properly routing an appropriate length of hose. The other end of the pre-filter can also have a section of hose added to put the inlet in a "less dusty" area such as under the fuel tank or wherever you choose. This makes it easy to add a larger pre-filter without worrying whether it (the pre-filter) will fit in a less roomy area such as under the fuel tank.For best results cut vent hoses so they do not droop lower than the barbed fitting they connect to when the bike is in an upright position. This will prevent the possibility of any fuel remaining in the vent line between the carb and the vent filter after a crash, where the bike has been on its side or upside down. Ideally, any fuel that may happen to get into the 4 carb vent tubes connected to the vent filter, should go to the bottom of the vent filter. To check for fuel in the vent filter, simply remove the rubber plug from the bottom of the vent filter drain. After checking or draining fuel, simply replace the rubber plug to keep from sucking dust or dirt into the open drain. Note:The carb vent filter comes with 2 spare foam filters with another one installed. The installed filter is not oiled and should be lubricated for best results. Engine or preferably air filter oil should be used. INSTALLATION: Isolate the drain hose coming from the bottom of the float bowl. This hose DOES NOT connect to the carb vent filter. This hose should have a loop in it (see pic) and filled with fuel to act as a check valve to keep dirt from entering, while also allowing it to drain in the event of a crash or the bike falling over. Once a loop is placed in this hose, you can loosen the float drain screw to add some fuel to the hose, or lay the bike on its side for a minute or so. Gather the 4 remaining carb vent hoses and lay them over the chain guard to prepare for cutting them to the correct length. Using the pic as a rough guide, carefully cut the carb vent tubes as shown. This will get them close to the finished length which will be determined after the next step. Connect the supplied 2 foot long piece of clear 1/4" tubing to the straight inlet barb and route it as shown in the pic. Using one tie wrap, mount the carb vent filter on the inside of the left frame tube, with the groove in the vent filter closer to the bottom. Remove the tie wrap that holds the plastic frame guard and install the carb vent filter with the larger straight fitting facing up and the smaller angled fitting sitting on the chain guard facing towards the engine. I normally mount the 2 furthest vent tubes (from the right side of the carburetor) to the top two barbs and the closer two tubes (from the left side of the carburetor)on the bottom two barbs.
TIP:1. The tubing can be hard to push over the barbs if it is old, cold, or just a stiff type of plastic tubing. Use a hair drier or a heat gun to heat the ends of the tubing right before pushing it onto the barbs. Another method is to heat up a cup of water in the microwave and dip about 1/2" of the end of the tubing in the hot water for approximately 10-20 seconds to soften it.
TIP:2. To service the vent filter just cut the tie wrap, leave the smaller drain elbow in the large plug, and unscrew the large plug from the bottom. There is never a need to remove the top inlet fitting so leave it connected to the inlet hose. Then pull out the foam filter with a tweezers or small needle nosed pliers. Be careful when oiling the filter foam and squeezing the excess oil out of it. Do not stretch the filter foam or it can and will break. Just put the oiled foam filter in a paper towel and squeeze the excess oil out. Installation of oiled filter is just reverse of removal. The plug can be finger tightened or gently tightened with a 13/16" open end wrench. Using a pliers is not recommended.
Update: I had one customer with a little problem that ended up being caused by the "loop" in the float bowl drain. The cure was to not loop the carb float bowl drain tube. This was the first report of this and if it happened to anyone else, they never mentioned it. I suggest trying the loop as instructed above and if it works just go with it. If it doesn't, then it may be due to another restriction in the carb, like dirt internally, or a different model carb that also uses the drain overflow tube (standoff) as a float chamber vent. I am currently working on an additional mod to the float bowl drain tube but do not know if it will be necessary for everyone and will either be offered as an option, or added to all future kits with a small increase in price. Stay tuned...
Update: September, 2015 If you received a small silver colored valve in your kit, it can be added to a short length of clear tubing after removing the rubber drain plug. Then add another piece of tubing and route it in the wire frame where the original drain lines went. This serves as a sight-glass and a drain. Not needed if you never lay down the bike, but easier and less messy to drain the carb vent if you do. More updates coming soon, including store to order carbvents, tubing, filters, etc...
UPDATE: 10-20-2016 The website is undergoing some major updates to fix a few problems with the communications. Some emails were not being forwarded to me so I missed some pre sales questions. My auto email forwarder has become unreliable due to the spammers of the world. My host and the never ending battle against spam has caused the cloud to black list legitimate emails to cut down on spam and unfortunately, it affects us all. Thanks for your understanding and patience while I get things going again.